
Drafting Table Assembly Instructions for Beginners
- January 4, 2023
If you’re having problems with setting up your new drafting table and understanding the drafting table instructions, there can be a few reasons behind it. So, what are they? Setting up most drafting tables is accessible only if you understand the instructions correctly. Many manufacturers fail to provide a comprehensive and straightforward set of instructions. They fill the manual up with convoluted diagrams and indecipherable speeches.
Also, there are certain things you can do to make the whole process a lot easier. Don’t worry, as this article will provide you with a step by step drafting table assembly instructions set alongside some useful tips to make the whole process a lot smoother. Let’s dive in.
Choosing the Right Type of Table for Drafting
You must choose the correct type of table for your workspace for the utmost comfort. There are mainly four types of tables available in the market.
Pedestal Drafting Tables
These types of tables have exceptional tilt range flexibility. You’ll be able to set the surface anywhere between 0 to 90 degrees angle.

A simple height adjustment feature might also be available in some products. The base frame design requires very little space compared to other drafting table types, making it a solid choice for a smaller workspace.
Folding Drafting Tables
A foldable table can be easily folded into carriable size. These tables are suitable for artists, engineers, or architects who are always on the run.
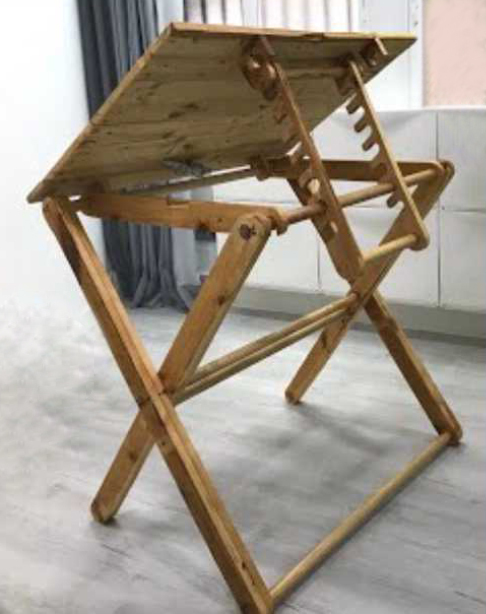
They are also built with lighter materials for better portability, and as a result, they are cheaper in comparison.
Four-legged Drafting Tables
This type of table is built heavy and durable. They can also take up a good amount of space, mostly because they’re often bought with customized surface size and storage features.

Highly Customizable Drafting Tables
These tables are preferred by professional artists, designers, and engineers because of their highly customizable features.

You can change the light intensity from the built-in lightbox, table height, surface angle, and other useful features according to your preference. These tables are also more expensive, in general.
4-Step Drafting Table Assembly Instructions
The procedure of setting up a drafting table can vary slightly based on the design or manufacturing company, but the core steps will remain the same, more or less. By coordinating these following steps with your manual diagrams, you should be able to get your table up in no time. Let’s have a look.
Separate the Parts
Right after you open the package, you’ll notice different parts of the table. And you’ll have to put them together yourself. The larger parts will provide the overall structure, while the smaller parts will add essential features to the table.
Your first focus should be separating the larger bits from the smaller bits. The larger bits would include the base frame, table legs, tabletop surface, etc. You’ll work on these first.
Once the structure is ready and up, you can focus on the smaller parts. These include storage compartments, drawers, a lightbox, racks, ledges, and many other features.
Set up the Base
After separating all the large parts, focus on the base pieces. Depending on the design, these pieces may vary, but there should be a base frame among them. Set the base frame on the ground with the right side up.
If there are wheels, you’ll find spots to attach them at the bottom of the frame. Make sure you set the wheels beforehand because it’ll be increasingly difficult to do so in the latter steps.
After that, find the leg tubes and attach them to the base frame. You’ll need to fasten the parts with screws, so make sure not to miss one or keep some of them loose.
Read more : The advantages of CAD
Install the Tabletop
Finished setting the legs? Now let’s set the topmost surface. Before setting the tabletop, your table legs must be correctly leveled.
For a more convenient reach, set the tabletop on the ground upside down. You’ll see the guide tracks (track like design to fixate your tabletop) at the sides. Now properly align the base frame structure with the guide tracks and fasten it.
If your table is built heavier, lifting the frame upside down may not be convenient. In that case, you’ll have to keep the base steady and attach the top surface from below.
Attach the Pencil Ledge and Additional Drawers
Good job! You’ve finished setting up the structure. Now you can focus on the smaller parts. One attachment that will be common to nearly all drafting tables is a pencil ledge.
To attach the pencil ledge, drill a necessary number of holes on the front side of the table. Make sure to take proper measurements before drilling because the holes must match the screw openings of the ledge. After that, properly secure the ledge using screws.
If you have more storage compartments to connect, add them by following the same procedure. Drill the holes you’ll need, and then fasten the parts using screws.
Tips for Assembling Your Drafting Table
These are some basic tips that can make your assembly experience a lot smoother. Let’s take a look at them.

Know the Table’s Type and Manufacturer
You should be aware of your desirable table’s type and source. This means knowing what features and setup type the table has alongside the manufacturer’s name. Knowing the right keywords will help you find the right set of information online.
For example, Hamilton is a very prominent drafting table manufacturer, and they make various types of tables. If you search online for “Hamilton drafting table assembly instructions”, you should find satisfactory results.
Choose the Assembly Spot
Assemble your table near the spot you chose to place the table. This will reduce the hassle of placing the table on the spot and give you a proper idea of the space required.
Set a Mat
Assembling your drafting table on a wooden or linoleum floor can create scratch marks. There can be even more damage if the table build is comparatively heavy.
To avoid scratching or damaging your delicate floor, put a thick mat on it first.
Check the Parts
After opening the package, make sure all the parts are present. Nothing can be more frustrating than half-building the table and finding out that a key part is missing.
Also, make sure all the parts are sound. A defective part can significantly weaken your table’s structure. In such cases, contact the manufacturer as soon as possible and ask for a replacement.
Test the Final Structure
When you’re finished setting up your table, make sure to test the durability and load capacity of your table. This will save you from a lot of disasters in the future.
Frequently Asked Questions About Drafting Table Instructions
Here I tried to answer some of the most asked questions related to drafting table instructions across the internet. Let’s take a look.
How to determine the right table size?
You must get the right-sized table for your workspace. Consider the space of your working spot when getting the table. Measure the available space and determine a suitable size so that the space doesn’t become too crowded.
What kind of accessories can you get with your drafting table?
Manufacturers keep a wide range of accessories available to attract customers and allow them to meet their personal needs.
Huge pencil ledges, dimmer-included lightboxes, built-in sharpeners, color palette holders, and many other accessories are available for you to choose from. So, before buying a drafting table, make sure you review all the available options and customize your order according to your needs.
How to test my table’s assembly integrity?
Drafting tables collapsing after assembly is a common problem and it occurs mainly for two reasons. A faulty assembly process or overload. After putting your table together, shake it a little to see whether it wobbles or feels fragile or not. If it feels wobbly, you might have done something wrong.
Should I keep a helping hand around while assembling?
That would be ideal. While the instruction might be simple, some of the table parts can be quite heavy. Attempting to assemble a drafting table alone will consume a lot of time along with much physical effort. So, try to keep one or two helping hand around. Working two people on the process instead of one can cut down the assembly time from 2-3 hours to just 3o minutes.
Conclusion
If your passion or profession revolves around a drafting table, then choosing the right option and properly assembling it is extremely important. Setting up a drafting table is easy only if all the drafting table instructions and diagrams are clear to you. This article should make your table setup experience much easier, and help you access the table’s owner manual better regardless of the brand.