
Expert’s Guide to How to Design for Additive Manufacturing
- October 20, 2023
How to Design for Additive Manufacturing?
Recently, Additive Manufacturing (AM) has revolutionized the way we create and produce objects. This innovative technology allows for the creation of intricate and complex designs that were once thought impossible.
You can be an engineer, designer, or simply someone interested in the world of 3D printing. Our guide will walk you through the intricacies of designing for additive manufacturing.
We will explore the key principles, share practical tips, and provide examples to help you master the full potential of this groundbreaking technology.
What Is Additive Manufacturing?
Before diving into the design principles, it’s important to have a solid knowledge of Additive Manufacturing. In this part, we will cover the basics and explain the key concept. This is the primitive part of learning how to design for additive manufacturing.
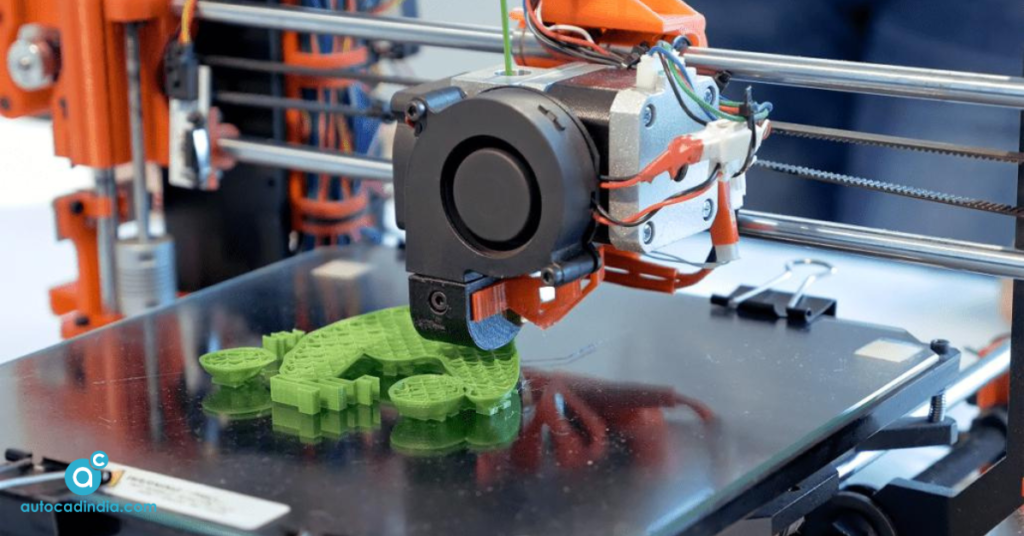
Additive Manufacturing, also referred to as 3D printing, is a method to create three-dimensional objects by adding material layer by layer.
Unlike traditional subtractive manufacturing, which involves cutting or machining material from a solid block, AM builds an object from the ground up.
This layer-by-layer approach is what makes 3D printing distinct and enables the creation of intricate and highly customized designs.
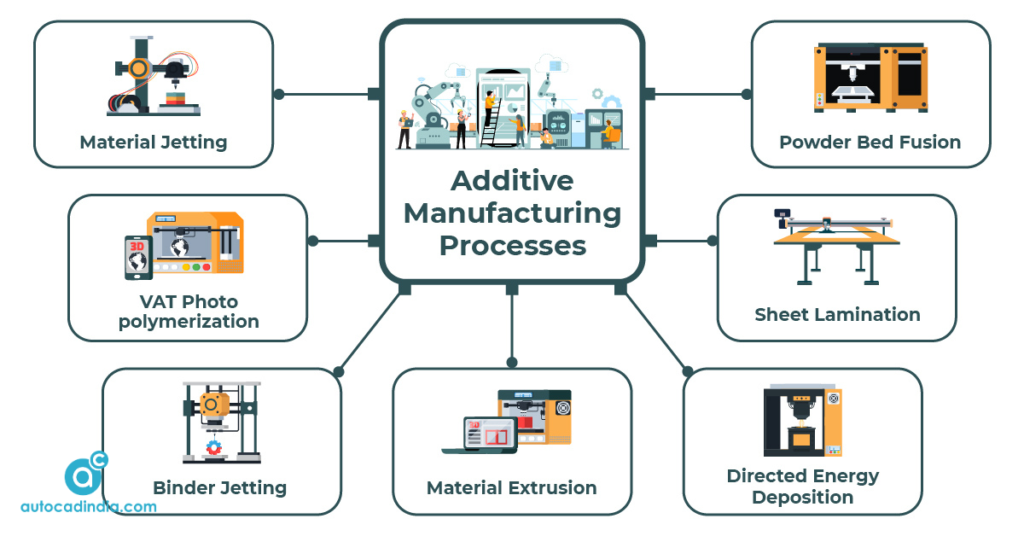
Types of Additive Manufacturing:
There are different additive manufacturing technologies. Some popular methods include:
Fused Deposition Modeling (FDM): This process extrudes thermoplastic filaments to create objects. It’s commonly used in desktop 3D printers.
Stereolithography (SLA): SLA uses a liquid photopolymer that solidifies when exposed to ultraviolet light, creating highly detailed and accurate objects.
Selective Laser Sintering (SLS): SLS uses a laser to sinter or fuse powdered materials together, such as plastics or metals.
Electron Beam Melting (EBM): This method uses an electron beam to melt and fuse metal powder, primarily used for producing metal parts.
Key Benefits of Additive Manufacturing:
- AM (In Short) allows for complex, organic, and previously impossible geometries.
- Quickly turn your design ideas into physical prototypes. It can produce intricate and complex designs that are difficult or impossible with traditional methods.
- Since AM only uses the necessary material, waste is minimized. Traditional manufacturing often generates a lot of waste material, but additive manufacturing is more material-efficient.
- You can create unique, one-of-a-kind products connected to individual needs. It allows for the production of highly customized and personalized products.
- Enjoy the privilege of lower production costs for low-volume, high-complexity parts.
How to Design for Additive Manufacturing?
To design successfully for AM, you need to consider various factors that differ from traditional manufacturing methods. Let’s dive into these essential design guidelines and learn how to design for additive manufacturing.
** Note: AM excels at producing complex, intricate shapes. Embrace the design freedom it offers. Be mindful of overhangs and consider adding overhead support structures where necessary.
You will also have to consider the wall thickness. Ensure appropriate wall measurement for structural integrity. Also, understand the tolerances of your AM system to avoid issues with fit and assembly.
Step 1: Set Goals
This is your first step to how to design for additive manufacturing, you need to define your project objectives. Ask yourself what you or your client want to achieve, whether it’s creating a functional prototype, a piece of art, or a custom part for a specific application.
You can use tools like Microsoft Word or note-taking apps to document your objectives.
Step 2: Build A Concept
Generate ideas and concepts to learn how to design for additive manufacturing. This is a creative phase where you brainstorm and sketch your initial concepts.
You can use Pen and paper, or digital sketching tools like Adobe Illustrator, Procreate, or Autodesk SketchBook. One step further software like Tinkercad, Blender, or Fusion 360 can help you create 3D concept models.
Step 3: AM Basics to Your Mind
Give a pause here and familiarize yourself with the specific AM technology you plan to use any of the three types – Fused Deposition Modeling – FDM, Stereolithography – SLA, Selective Laser Sintering – SLS, etc. Start learning the material options and limitations of the chosen AM process.
**Tips: Online resources, tutorials, and manufacturer-provided documentation are your best resources for learning about AM technology and also how to design for additive manufacturing.
Step 4: 3D Modeling and Design
Now, it’s time to create a 3D digital model of your design. You can use any of the software below,
Tinkercad: Great for beginners and simple designs.
Fusion 360: A powerful, professional-grade tool for parametric 3D modeling.
Blender: Ideal for artistic and organic designs.
SolidWorks: Widely used in engineering and industrial design. Learn how to scale a model in SolidWorks
We are going to use SolidWorks as a reference for this article. Remember that, additive manufacturing builds objects layer by layer.
Design your part with this in mind. Avoid overhanging features that might require support structures, as these can be challenging to remove and may affect the final quality.
Step 5: Minimize Support
If you must include overhangs or unsupported features, design them with support structures in mind. SolidWorks has tools for generating these supports. However, minimizing the need for support is generally preferable.
Consider the material you’re using and design with material efficiency in mind. Hollow structures, lattice infills, or variable wall thickness can reduce material consumption and, in some cases, improve part performance. We are almost there!
Step 6: Pay Attention to Tolerance
Design parts with appropriate tolerances to ensure proper fits and clearances. Since 3D printing can have slight variations, it’s essential to test and adjust tolerances accordingly to know how to design for additive manufacturing. Also, when designing parts for assemblies, ensure the fit and alignment are accurate. Test the parts with prototypes to ensure they work together seamlessly.
Step 7: Optimize for Printing
Once your 3D model is complete, optimize it for AM. Experiment with different orientations to reduce support structure requirements and improve surface finish. If needed, add support structures to prevent overhangs and ensure successful printing. SolidWorks allows you to visualize printing orientation and add support structures.
Step 8: Send it to the 3D Printer
Before sending your design to the 3D printer, you’ll need to prepare it using slicing software. Slicing software converts your 3D model into a set of instructions for the 3D printer. The popular ones are,
- Cura: A popular, user-friendly slicing software.
- PrusaSlicer: Known for its reliability and support for various 3D printers.
- Slic3r: An open-source slicing software with advanced features.
Finally, you’ll send the prepared file to your 3D printer. Ensure your printer is properly calibrated and that you’re using the appropriate material.
Step 9: Post Processing
After printing, your object may require post-processing: (1) Sanding and smoothening rough surfaces, (2) painting or finishing for aesthetics, and (3) assembling multiple printed parts if necessary.
Remember that post-processing may not require software but tools like sandpaper, paints, or adhesives. Next is the last step to learn how to design for additive manufacturing.
Step 10: Test & Iterate
Test the printed object to ensure it meets your objectives. If not, make the necessary adjustments to your 3D model and repeat the printing process.
Keep records of your design files, settings, and any modifications made during the process. Proper documentation ensures you can reproduce or modify the design in the future. You can use document management software or cloud storage platforms like Google Drive or Dropbox.
Here are the steps! As interesting as it may sound, AM also involves some challenges such as,
- The range of materials available for 3D printing is more limited compared to traditional manufacturing.
- Some 3D printing processes can be slow, especially for larger objects.
- Ensuring consistent quality can be a challenge, especially for industrial applications.
Although challenging, additive manufacturing is a transformative technology that is changing the way we design and produce objects. Its applications are diverse, and it offers advantages in terms of design flexibility, customization, and material efficiency.
By following these steps and considering the unique requirements of your chosen 3D printing technology, you can effectively learn how to design for additive manufacturing and create parts that fully leverage the capabilities of this exciting manufacturing method.
How to Design for Additive Manufacturing: Highlights
As technology continues to evolve, it has the potential to revolutionize various industries and open up new possibilities for innovation.
The choice of software tools may vary based on your specific needs and familiarity with the software, but the key to success is understanding the principles of AM technology and its capabilities. With practice and experience, you can unlock the full potential of Additive Manufacturing for your projects.
We will soon come back with another how-to guide at your advantage, don’t miss our regular blogs.