
Here Is the Secret Sauce to Converting Engineering Drawing 2D to 3D
- January 19, 2024
Have you ever felt like your project’s blueprint is missing a little something – a touch of depth and clarity? That’s where the magic of converting engineering drawing 2D to 3D comes into play. It is upgrading your project from a flat image to an interactive experience.
In our article, we will explore this transformation, and don’t worry – no complicated jargon or mystical terms here! We’ll keep it simple and user-friendly, just like having a friendly guide to show you the ropes of taking your designs to the next dimension. So, let’s work it out and start learning different 3D models. Together, we will uncover the why and when of converting engineering drawing 2D to 3D.
Converting Engineering Drawing 2D to 3D: How You Do It
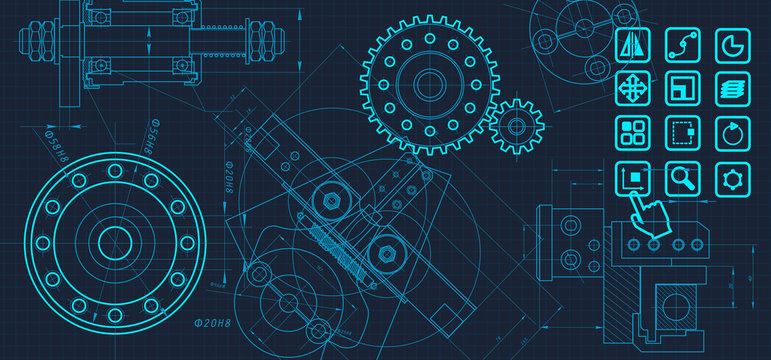
Let’s take a moment to delve into the fundamentals. In the realm of drawing, 2D sketches is one kind of flat snapshot of an object. They show how long, wide, and high something is, but it’s all on one level, like a picture on a piece of paper.
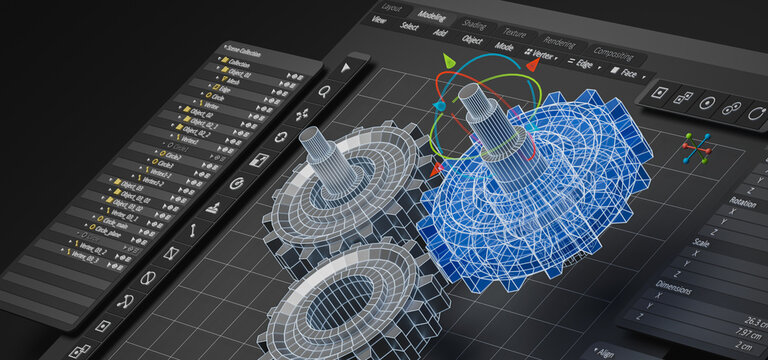
Now, on the flip side, when we talk about 3D models, we are entering a world where things get a bit more lifelike. Here, we’re not just sticking to the flatness of a single sheet; we’re adding that extra dimension.
So, think of it this way: 3D brings in depth, height, and width. It’s as if turning that picture into a sculpture you can see from different angles. It is more like the real deal, giving us a fuller picture of what’s going on.
How do You Convert 2D to 3D? Here are the details, below –
Step 1: Choose the Right Software
To kick off the conversion process, you’ll need suitable software. Opt for user-friendly 3D modeling tools such as TinkerCAD, Fusion 360, or SolidWorks. The platforms provide friendly interfaces. It makes the transition from 2D to 3D a breeze.
Step 2: Import 2D Drawing
Once you have selected your preferred software, import your 2D drawing into the program. Most applications allow you to upload files in common formats like DXF or DWG. This step sets the foundation for the 3D transformation.
Step 3: Identify Dimensions and Features
Carefully examine your 2D drawing, identifying key dimensions and features. Understand the depth and height of relationships between different elements. It is a crucial step for accurately translating the 2D representation into a three-dimensional model.
Step 4: Extrude and Elevate
Now, let’s bring the drawing to reality. Utilize the extrude feature to add depth to your 2D shapes. In simple terms, extrusion involves pulling a 2D shape into the third dimension. Elevate specific sections based on the identified dimensions to create a more realistic representation.
Step 5: Incorporate Additional Features
Improve your 3D model by incorporating additional features. This could involve adding fillets, chamfers, or other geometric details that were not present in the original 2D drawing. Pay attention to finer details. It ensures the accuracy of your 3D representation.
Step 6: Group and Organize
To maintain order in your 3D model, group related elements together. The step ensures that your final product is well-organized and easy to navigate. Grouping also allows for easier manipulation of different parts during the design process.
Step 7: Review and Refine
Before finalizing your 3D model, take a moment to review and refine it. Ensure that all dimensions are accurate, features are well-defined, and the overall design aligns with your initial 2D drawing. Most user-friendly software platforms provide tools for easy adjustment.
Why Converting Engineering Drawing 2D to 3D?

Now that we comprehend the advantages of 3D conversion, let’s get into the situations where it becomes not just beneficial but a downright necessity.
1) Complex Designs:
When your project involves intricate details, converting to 3D simplifies the representation to a significant extent. It’s akin to switching from a detailed manual to an interactive guide, making it immensely easier to navigate through complex designs. The three-dimensional aspect allows for a more comprehensive understanding of the project’s intricacies.
2) Collaborative Projects:
In team projects, especially when team members are dispersed across different locations, a 3D model becomes an indispensable tool. It’s comparable to having a shared virtual workspace where everyone can visualize and actively contribute to the project, fostering seamless collaboration. The interactive nature of 3D models promotes efficient teamwork and minimizes communication barriers.
3) Client Presentations:
When it comes to client presentations, integrating a 3D model can be a game-changer. It’s like upgrading from a static slideshow to an immersive experience. Clients can better comprehend the design, providing them with a realistic preview of the final product.
This not only enhances client satisfaction but also strengthens the communication of design concepts, making the presentation more engaging and persuasive.
4) Simulations and Analysis:
If simulations and analyses are integral to your project, opting for 3D models offers a more accurate representation. It’s comparable to using a high-powered microscope rather than a standard magnifying glass.
This distinction allows for in-depth analysis and simulations, providing a more realistic and precise understanding of how the project will function in different scenarios. The three-dimensional perspective enhances the accuracy of simulations, contributing to more informed decision-making.
Final Words
Select easy-to-use software like TinkerCAD, Fusion 360, or SolidWorks, you’re on the right track. Import your 2D drawing, understand the sizes, and give it life by using the extrude tool.
Don’t stop there; add extra details to make your 3D model pop. Think of it as giving your creation a stylish upgrade with fillets, chamfers, and more. Organize things neatly by grouping related parts, making it a breeze to work with.
So, there you have it – transforming 2D to 3D is a creative journey, not a complicated puzzle. Enjoy the process, tweak things as needed, and before you know it, you’ll be a professional 3D designer! Happy designing!